About Us
The Lincs Group LTD, a prestigious family run company of 30 years. Now supplying DIY & the trade
ConsultationContact Info
- Boston, Lincolnshire
- 01205 212305
- info@lincsgroup.uk
- Mon - Friday 0900 to 1700
About Us
The Lincs Group LTD, a prestigious family run company of 30 years. Now supplying DIY & the trade
ConsultationContact Info
- Boston, Lincolnshire
- 01205 212305
- info@lincsgroup.uk
- Mon - Friday 0900 to 1700
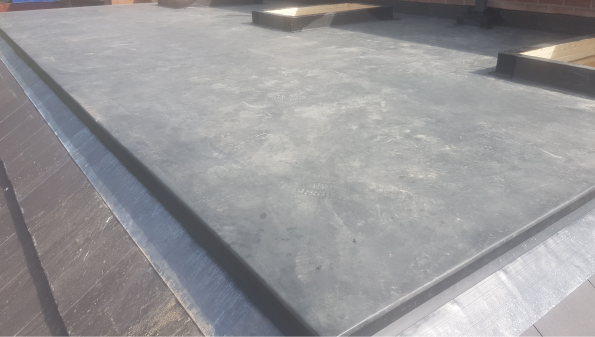
EPDM onto Tiles
Step-by-step guides to sealing your EPDM onto tiles, when your flat roof meets a pitched roof.
There are 2 methods here. If your finished deck height is more than 75mm above your top row of tiles, follow Guide 1 (ideal method).
If your finished deck height is flush or less than 75mm above your top row of tiles, firstly, consider building up to 75mm height difference, or - follow Guide 2.
Guide 1:
To complete this you will need to install some lead. We advise Code 4, with a 100mm overlapping joint every 1.2m. The width of your lead, will be determined by the vertical height difference between your tile and finished deck height, plus 150mm overlap onto the tile itself. (E.G 75mm height plus 150mm overlap = 225mm or 9’’ lead).
Step 1: Pull back your EPDM overhang. Place your lead into position, overlapped by 100mm every 1200mm.
The top of your lead must be just shy of being flush with the top of your decking (allows water run-off). You can secure it in position by using copper Tacs, tacking into the face of 18mm timber decking.
Then dress the lead down and onto your tiles, gently & neatly beating into position with lead beaters.
Step 2: Next follow the steps as seen in Edge trims – gutter.
In short, install your gutter trim back plate, again, just shy of being flush with top of finished deck to ensure water run off. Secure with 4 or 5 x 50mm fasteners, approximately every 500mm.

Step 3: Neatly cut your EPDM membrane overhang down to 50mm, then clip in your face plate.
Secure any joints & factory seam laps, again as seen in Edge trims – gutter

Step 4: For a long-lasting neat finish to your lead. Double check it is beaten into position correctly, then using a cloth and patination oil, apply an even layer to your lead.
This provides a very neat, professional finish.
Guide 2:
To complete this you will need to install some lead. We advise Code 4, minimum 300 width, with a 100mm overlapping joint every 1.2m.
Step 1: Your EPDM must overhang the top row of tiles by 140mm. Mark this with your chalk/crayon and a straight edge, then cut.
Make sure the tiles are clean and dry. You may need to use a wire brush and aerosol cleaner, plus a heat gun, to assist this.
Step 2: Fold back your EPDM. Next, using your Firestone Elevate Bonding Spray Adhesive, spray your overhang of EPDM and the depth of the tile it will bond to.
Once touch-dry, smoothly fold the EPDM back over, mating together. Work in with your Silicon Rubber Roller & Penny Roller.
Note, Your EPDM may not bond perfectly to the tiles. This stage is simply to defend against wind uplift.
Step 3: Dress your lead into position over your EPDM. The lead should be positioned so that it overlaps the EPDM on your tiles by at least 10mm (providing 150mm tile overlap), as well as leaving a minimum of 75mm on your deck.
For improved results, you can apply some bond and seal to the underside of the lead before positioning, as well as on each 100mm overlap. Don’t allow any bulging of excess sealant.
Gently beat lead into position using lead beaters.
Step 4: Using some washers and fasteners, secure the lead in place into your deck, approximately every 500mm, & approximately 20mm from the edge of the lead.
As an extra precaution, you can pilot the whole, apply some Firestone Elevate Waterblock into the hole, with a small amount on top, then secure your washer and fastening – wiping anyway any excess.
Step 5: You now need to flash over this area.
Using a straight edge and your crayon/chalk, mark 85mm either side of your fastenings (this will lap onto your EPDM).
Using your Quickscrub pad & handle, apply an even layer of Quickprimer Plus to this area, leaving no pooling.
Step 6: Cut to size your 6’’ Batten Cover Strip. Once your primer is touch-dry. Starting at one end, smoothly mate your flashing, removing the tape as you go. Keep the flashing tape taut as you go, without stretching, to help stop air pockets.
Work into place with your Silicone Rubber Roller and Penny Roller.
For extra precaution, you can neatly apply some Firestone Elevate Lap Sealant to each exposed end of your flashing. Don't apply to proud a bead as this can cause additional sitting water.